Consistent Python Build with pipenv
Managing dependencies in Python is kind of a mess. Let's try to make that better with pipenv


Managing dependencies in Python is kind of a mess. Let's try to make that better with pipenv
Install
MacOS
brew install pipenvWindows
First, install any version of Python 3 from the offical Python website. https://www.python.org/downloads/windows/
** Do not use the version that installed via Microsoft Store. You will get stuck trying to install dependencies later **
Make sure to select the latest 64-bit version
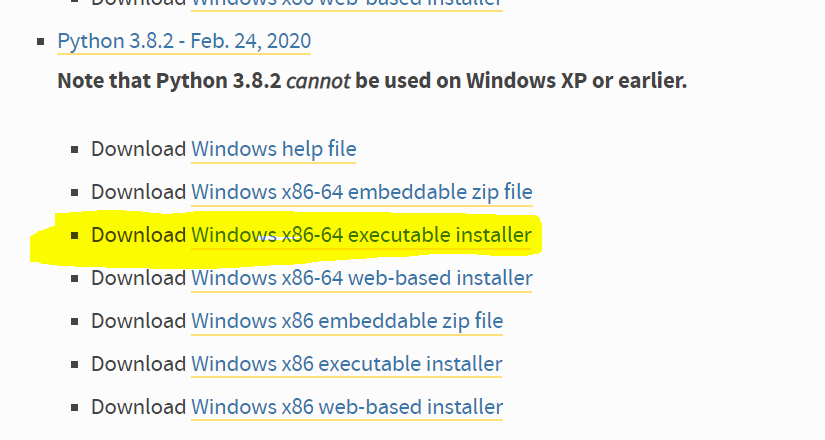
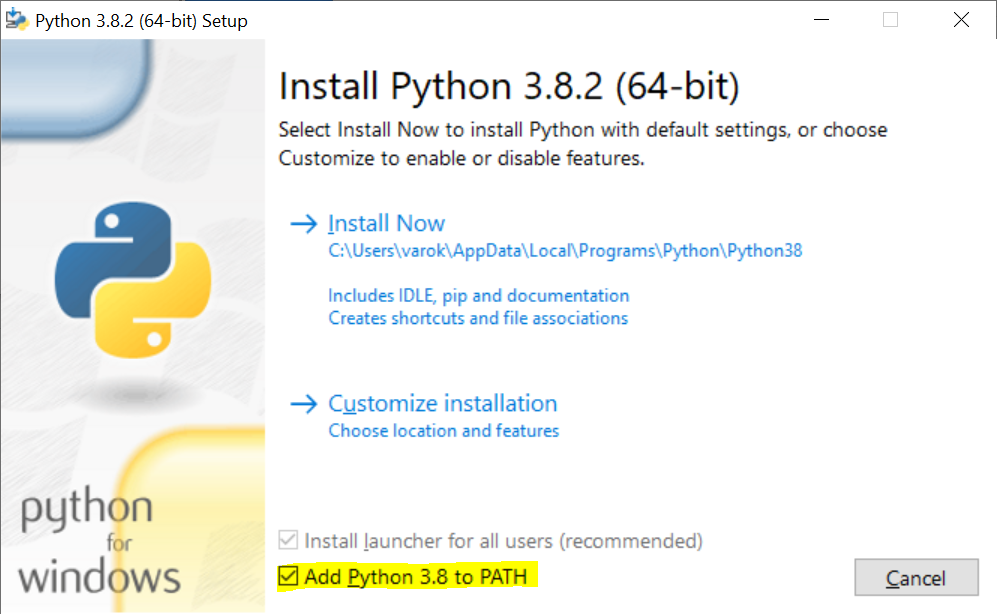
When installing also makes sure to adds python command to PATH
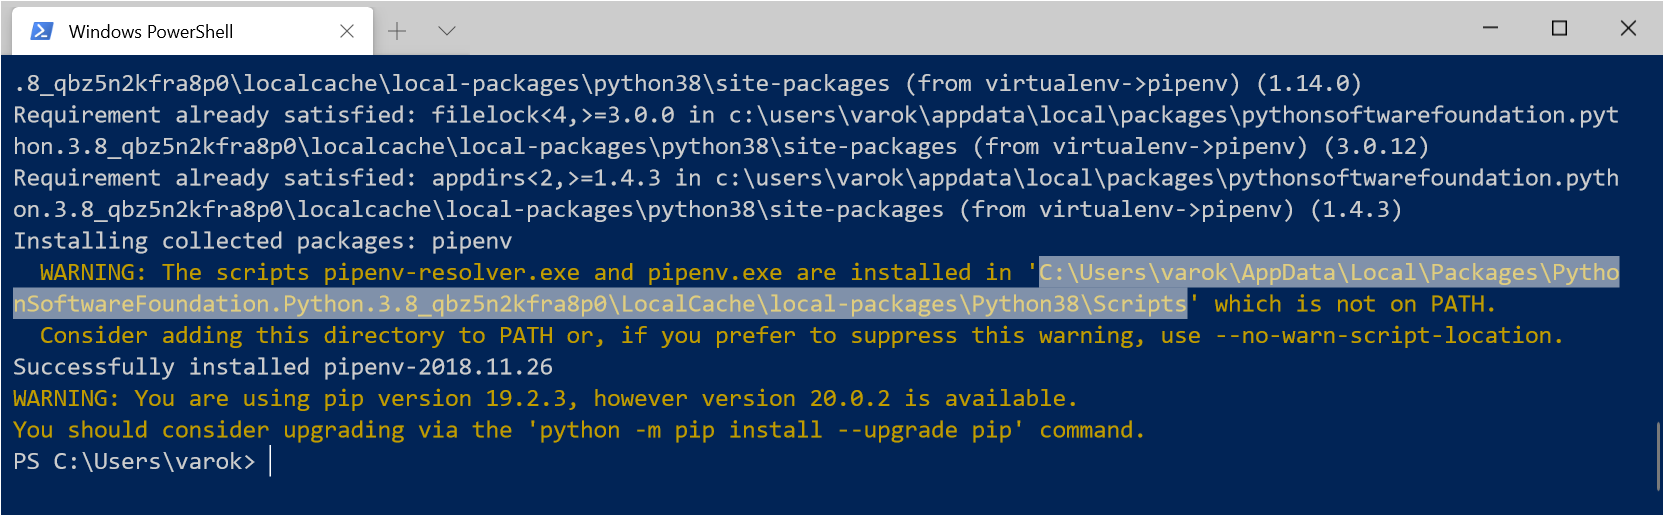
Then uses pip to install pipenv.
pip install --user pipenvMake sure to pay attention to the last few lines of output of the command complaining that what you installed is not on PATH. See and copy the highlighted value. If we somehow missed that message. Just uninstall by pip uninstall pipenv and try again.
Because of course this being Windows, it has to be hard. We need to set the PATH as instructed
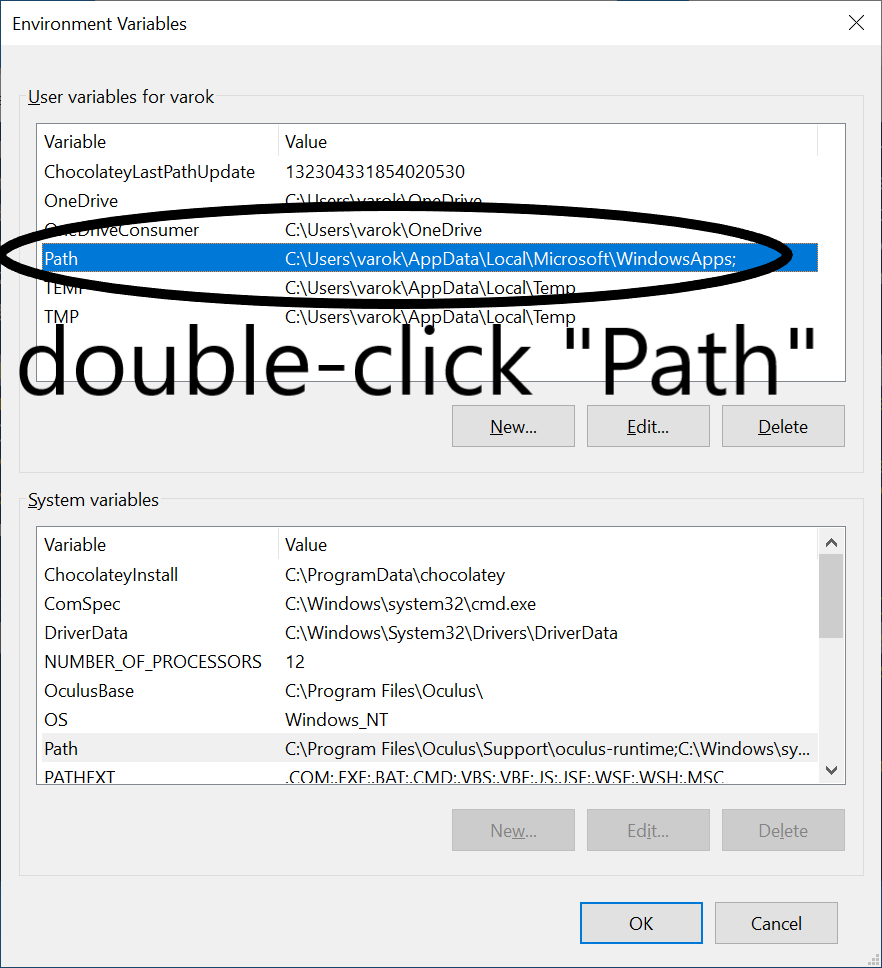
- Click Start Menu -> Type "environment" -> Select "Edit Environment Variables for your Account"
- Double-Click Path
- Click Adds and paste in the path without the quotes e.g.
Users\varok\AppData\Local\Packages\Python.
SoftwareFoundation.Python.3.8_qbz5n2kfra8p0\LocalCache\local-packages\Python38\Scripts - Click Okay and Okay again to close the windows
- Close all terminal windows
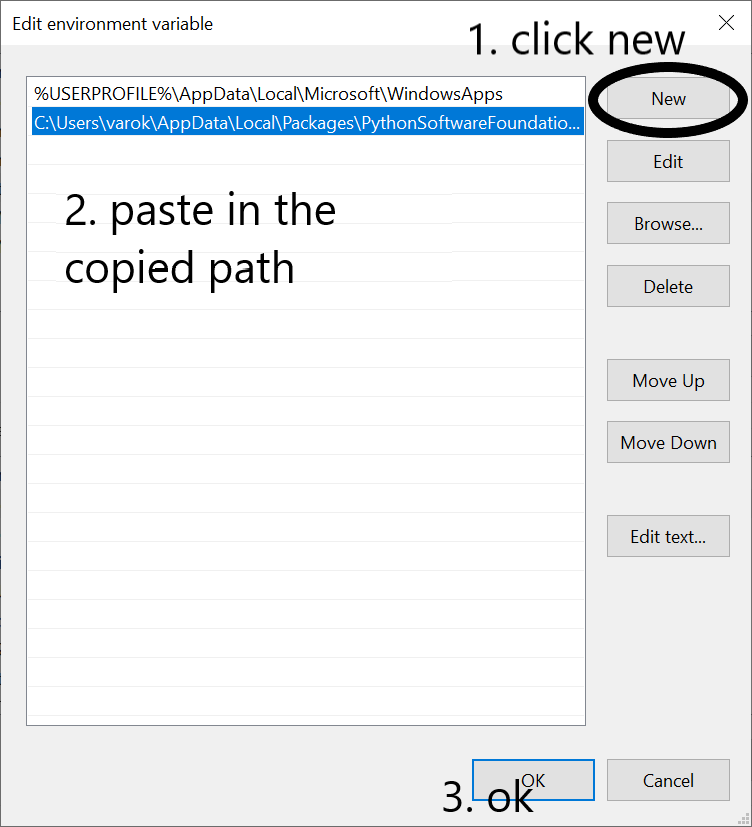
Launch the terminal window again, Then type pipenv to see that the command is working
How to use
Create a new project
$ pipenv --python 3Create a new project using python from Conda
# Or `where conda` for Windows
# Using (base) on conda is fine

(base) $ which conda
/usr/local/anaconda3/bin/python

(base) $ pipenv --python /usr/local/anaconda3/bin/python

Creating a virtualenv for this project…
Pipfile: /Users/varokas/demo6/Pipfile
Using /usr/local/anaconda3/bin/python (3.7.6) to create virtualenv…
⠋ Creating virtual environment...created virtual environment CPython3.7.6.final.0-64 in 700ms
  creator CPython3Posix(dest=/Users/varokas/.local/share/virtualenvs/demo6-F1ncer6E, clear=False, global=False)
  seeder FromAppData(download=False, pip=latest, setuptools=latest, wheel=latest, via=copy, app_data_dir=/Users/varokas/Library/Application Support/virtualenv/seed-app-data/v1)
  activators BashActivator,CShellActivator,FishActivator,PowerShellActivator,PythonActivator,XonshActivator

✔ Successfully created virtual environment!
Virtualenv location: /Users/varokas/.local/share/virtualenvs/demo6-F1ncer6E
Creating a Pipfile for this project…
Install requirements
Running this command will install the latest version of requests library in the current environment of this directory
$ pipenv install requestsThis command will download the latest version of requests. In addition it modifies two files, Pipefile and Pipfile.lock. One is used to describe the requirements as it is typed into the console. The other one records exactly what version of requests we pulled in when the above command ran. This helps in making sure the version of requests used by everybody in the team remains the same
Pipfile
[packages]
requests = "*"

[requires]
python_version = "3.7"
Pipfile.lock
...
...
        "requests": {
            "hashes": [
                "sha256:43999036bfa82904b6af1d99e4882b560e5e2c68e5c4b0aa03b655f3d7d73fee",
                "sha256:b3f43d496c6daba4493e7c431722aeb7dbc6288f52a6e04e7b6023b0247817e6"
            ],
            "index": "pypi",
            "version": "==2.23.0"
        },
...
...
Install requirements from Git repository
$ pipenv installRunning the command without package name will simply download all dependencies from Pipfile.lock at exactly the version recorded. This is tremendously useful in project sharing scenario
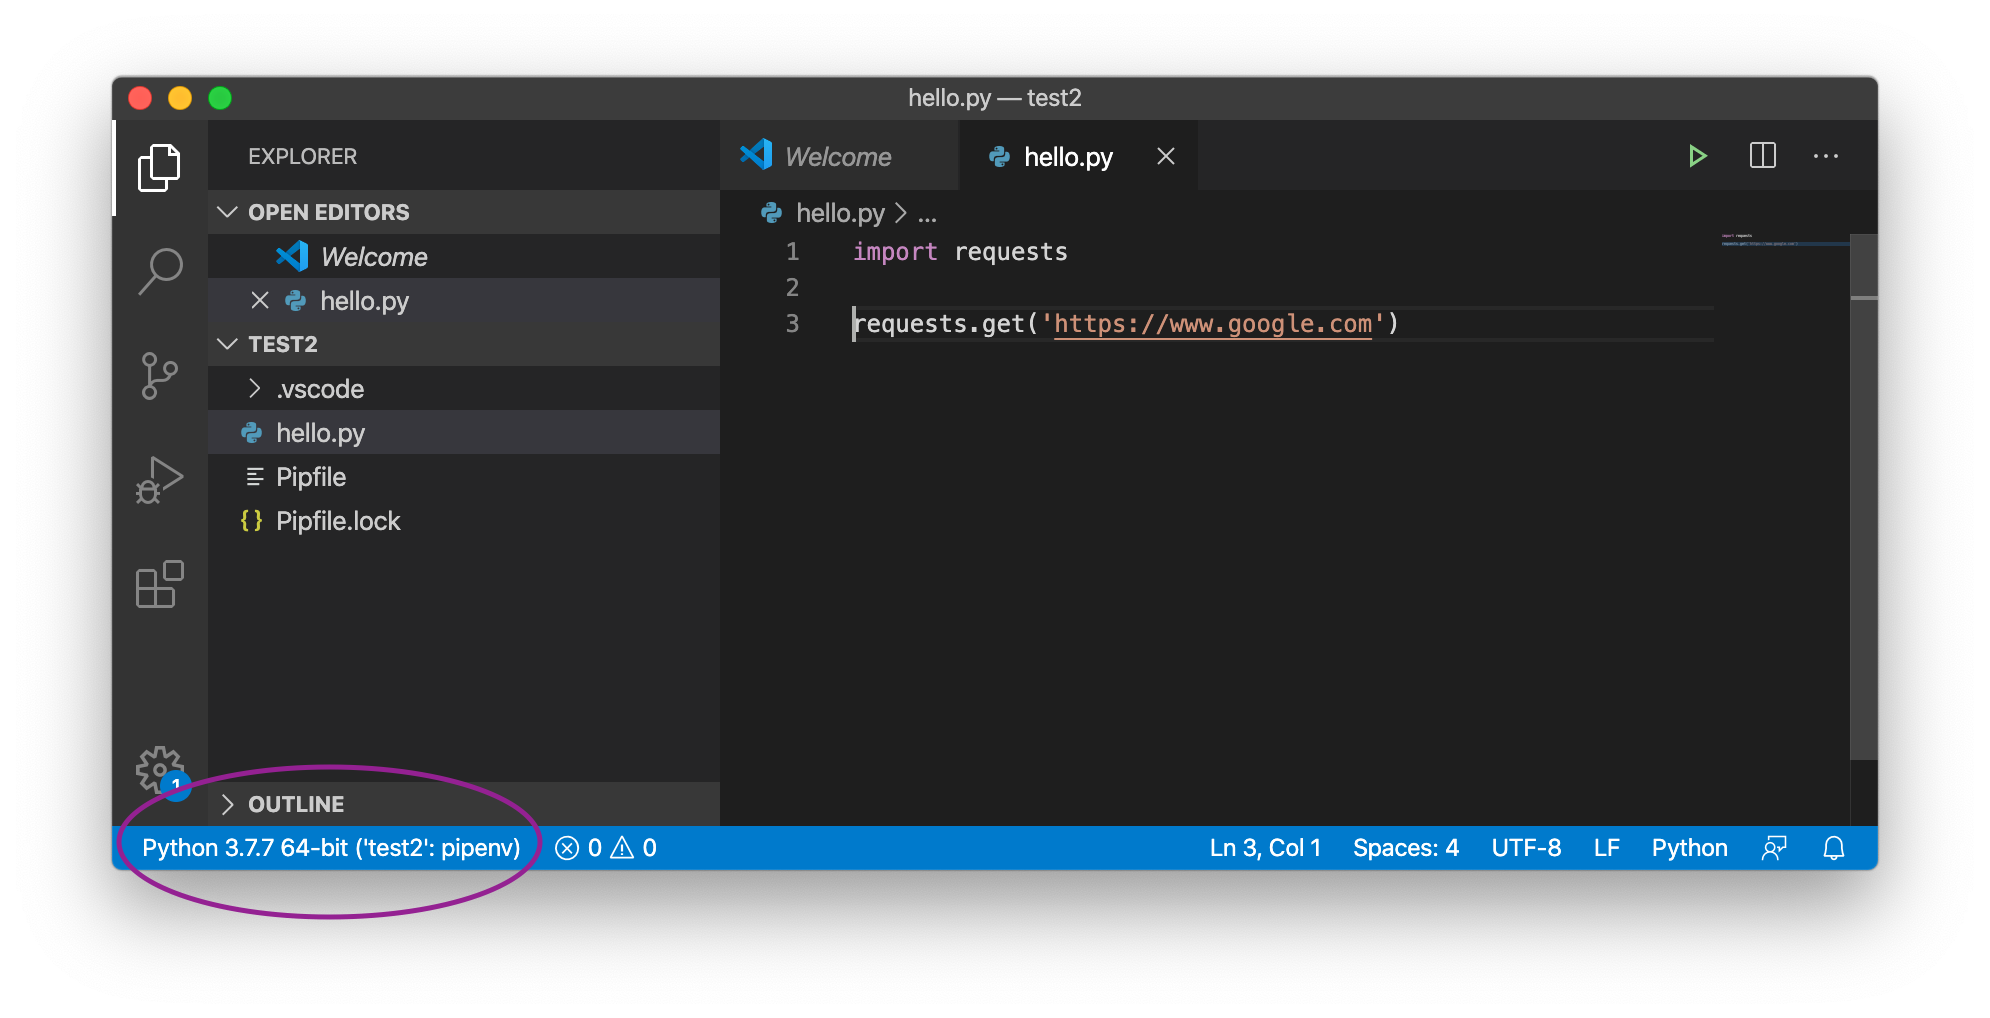
Integrating with Visual Studio Code
Being awesome as usual, Visual Studio Code already detects the current pipenv virtual environment when opening the folder.
Provided that we already installed the Python extension to VSCode (see link below how).

All we need to do is casually checks that the environment reported matches. More details can be found here: https://code.visualstudio.com/docs/python/environments
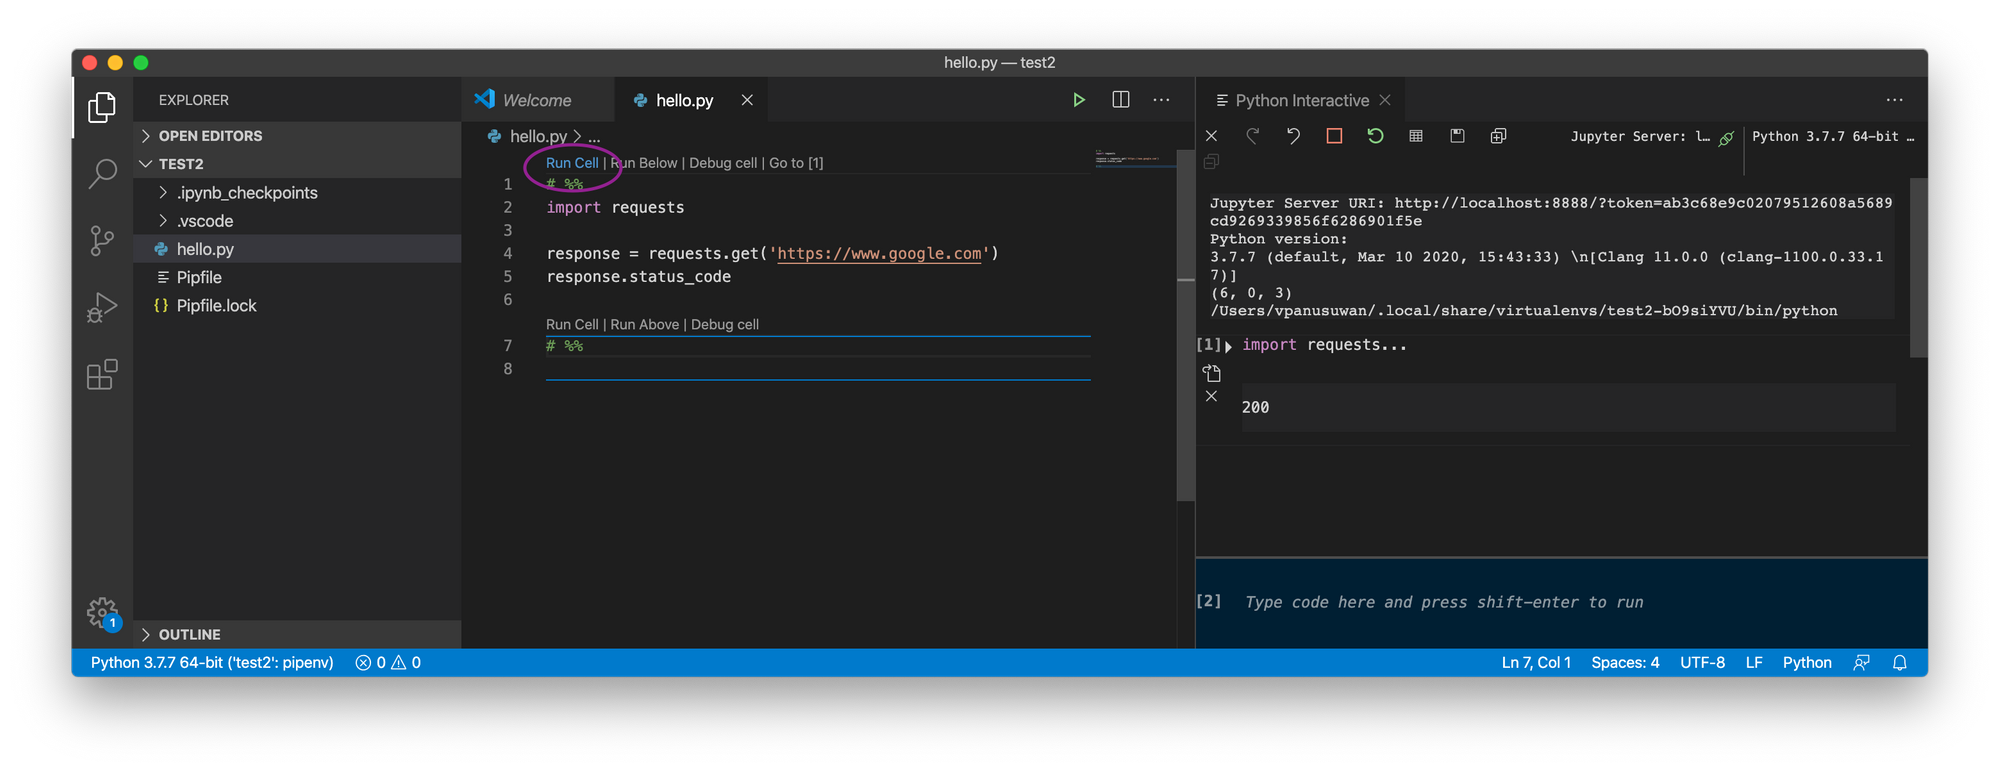
Integrating with Jupyter
First, Install Jupyter Lab as part of dev dependencies. Dev dependencies makes to clear that this is only needed for development, but not to run our code.
$ pipenv install --dev jupyterlabOption 1: Use Visual Studio Code native support for Interactive Python and Notebook.
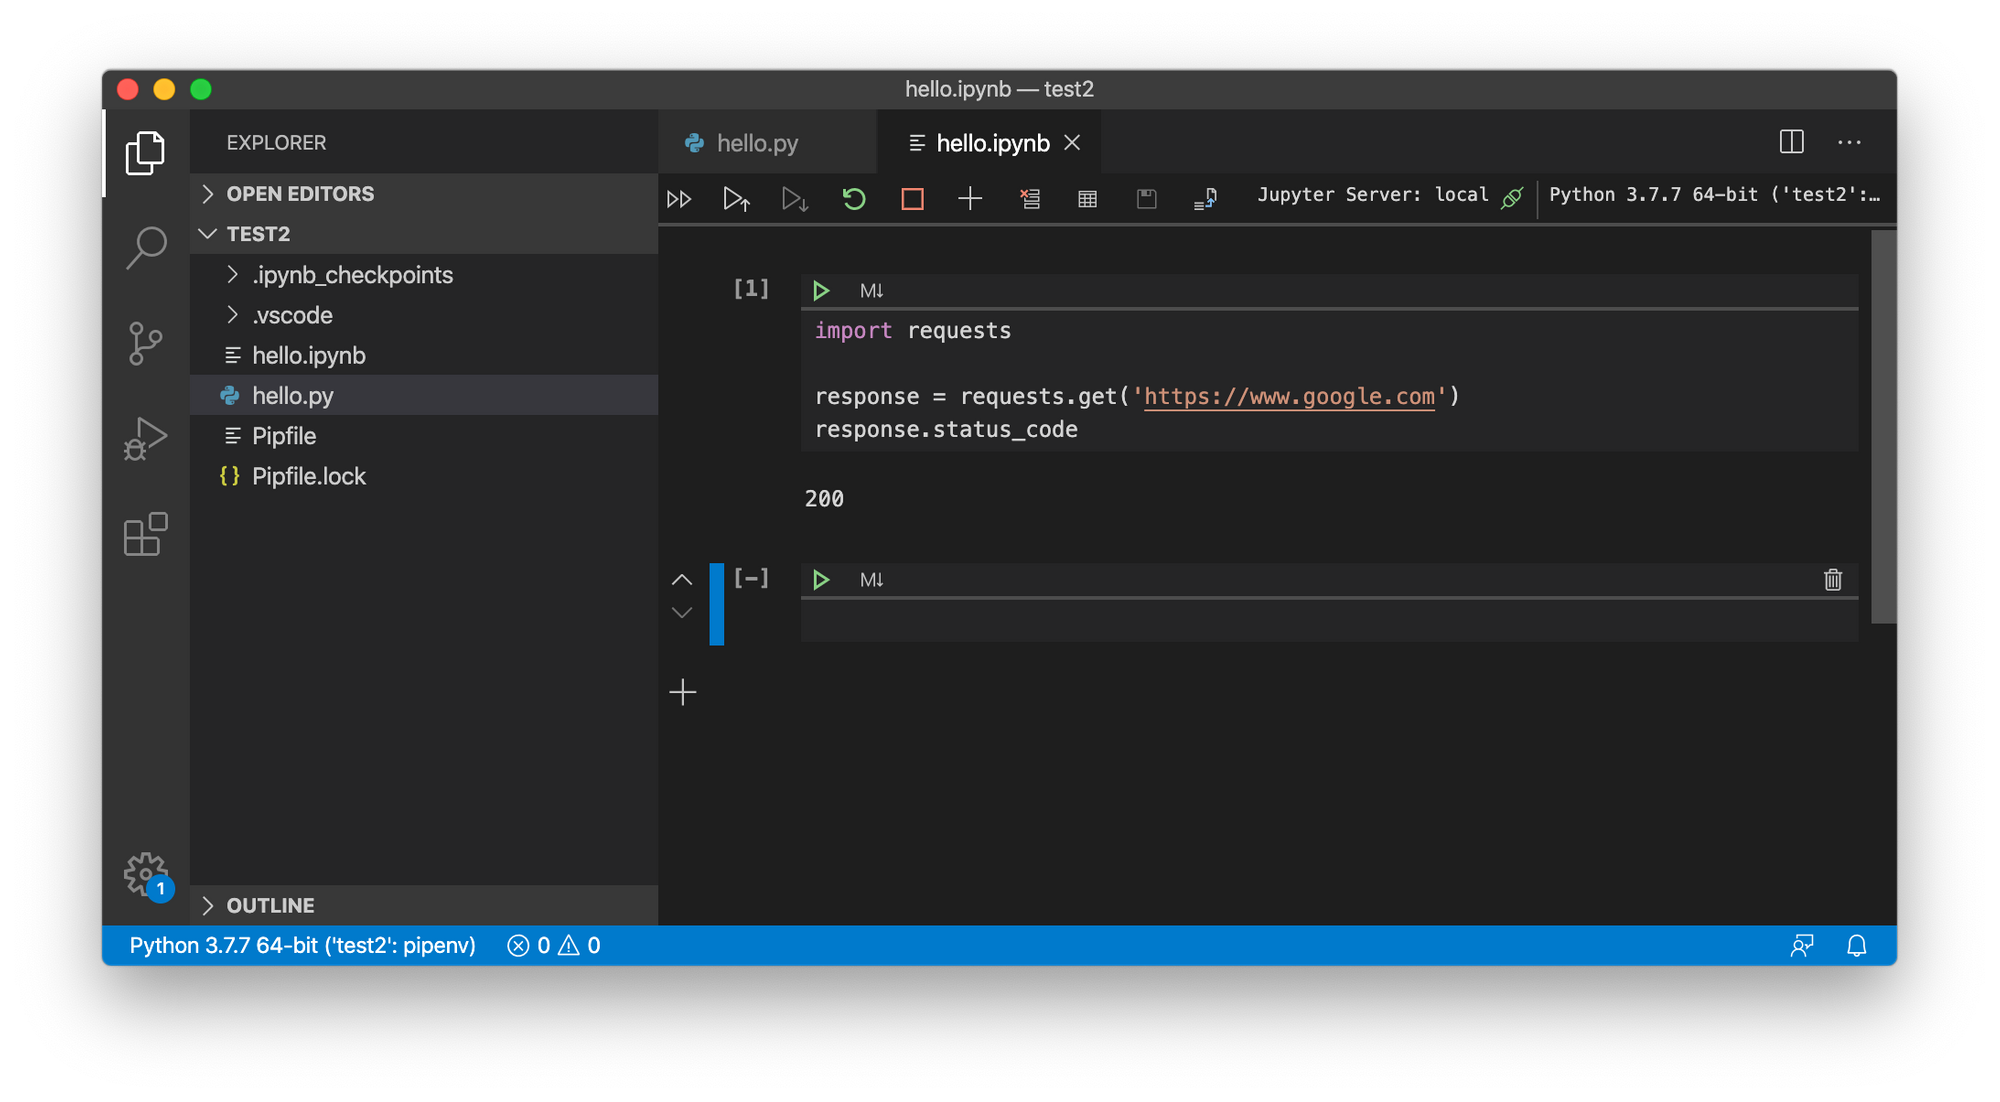
More details the two subjects here
Option 2: Run the installed jupyterlab
$ pipenv run jupyter labCaveats
Behind the scene, pipenv uses virtualenv to manage the environment. This is mostly transparent to us. However, if you change your project’s path, the mapping breaks and pipenv will no longer able to find the virtual environment