Using Kubernetes Locally in MacOS


Install Docker
brew cask install dockerInstall Kubernetes in Docker
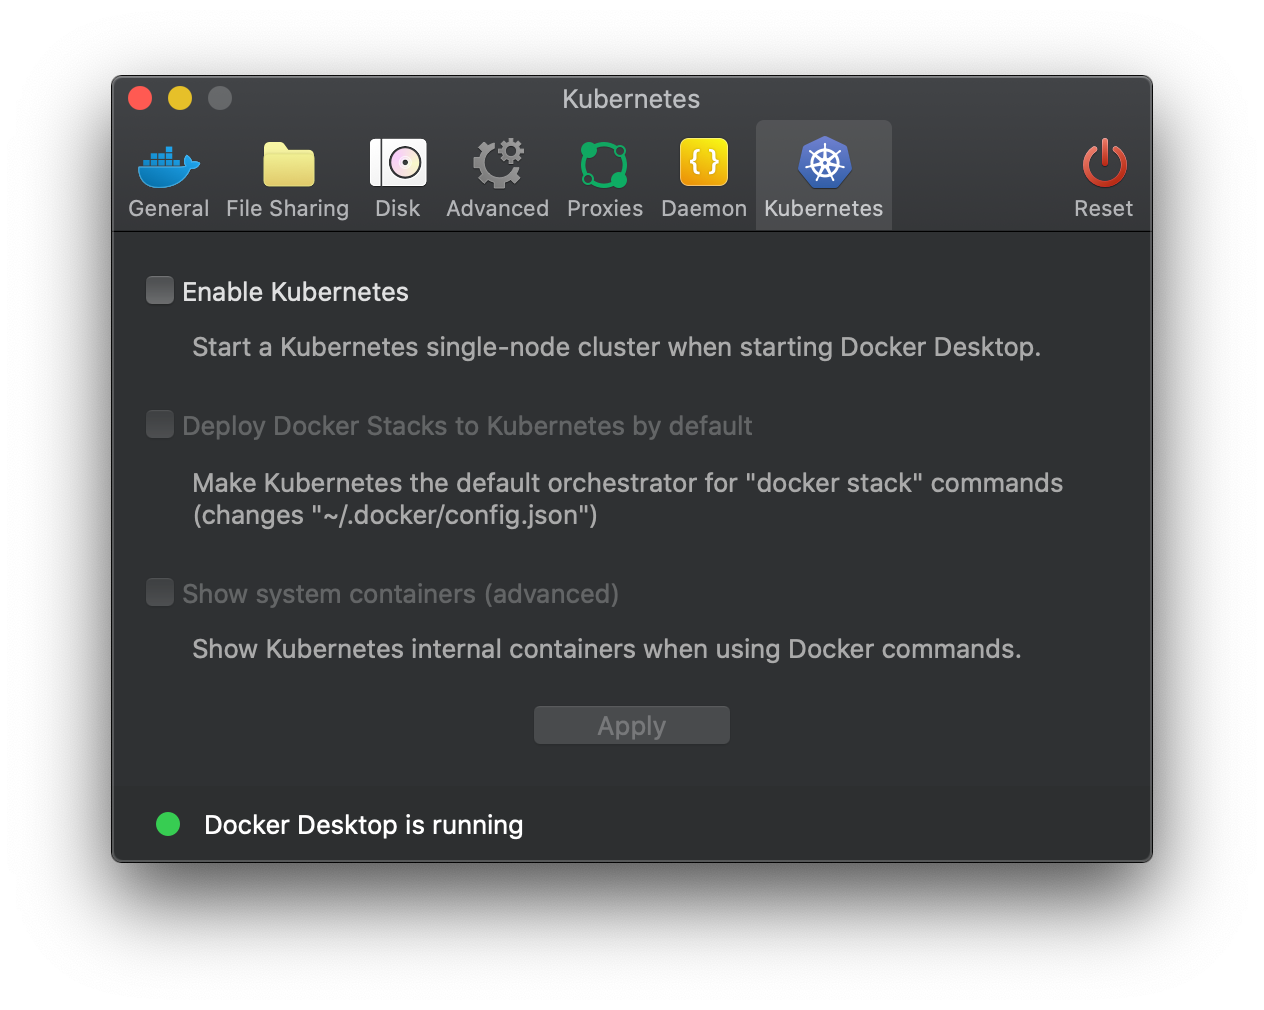
- Go to menu bar, select the whale icon -> preferences
- Select Kubernetes tab, then "Enable Kubernetes"
Check that docker is working
~ ❯❯❯ docker run hello-world

Hello from Docker!
This message shows that your installation appears to be working correctly.

To generate this message, Docker took the following steps:
 1. The Docker client contacted the Docker daemon.
 2. The Docker daemon pulled the "hello-world" image from the Docker Hub.
    (amd64)
 3. The Docker daemon created a new container from that image which runs the
    executable that produces the output you are currently reading.
 4. The Docker daemon streamed that output to the Docker client, which sent it
    to your terminal.

To try something more ambitious, you can run an Ubuntu container with:
 $ docker run -it ubuntu bash

Share images, automate workflows, and more with a free Docker ID:
 https://hub.docker.com/

For more examples and ideas, visit:
 https://docs.docker.com/get-started/
Check that Kubernetes is working
~ ❯❯❯ kubectl create deployment hello-node --image=gcr.io/hello-minikube-zero-install/hello-node

~ ❯❯❯ kubectl get pods
NAME                          READY   STATUS              RESTARTS   AGE
hello-node-78cd77d68f-8qm4b   0/1     ContainerCreating   0          19s
It may take a while for containers to be created the first time.
~ ❯❯❯ kubectl get pods
NAME                          READY   STATUS    RESTARTS   AGE
hello-node-78cd77d68f-8qm4b   1/1     Running   0          2m10s
Expose the service
❯❯❯ kubectl expose deployment hello-node --type=LoadBalancer --port=8080
service/hello-node exposed
Check that the service is exposed
~ ❯❯❯ kubectl get services
NAME         TYPE           CLUSTER-IP       EXTERNAL-IP   PORT(S)          AGE
hello-node   LoadBalancer   10.111.189.114   localhost     8080:31077/TCP   5m37s
kubernetes   ClusterIP      10.96.0.1        <none>        443/TCP          28m


~ ❯❯❯ curl localhost:8080
Hello World!%
Delete the service
~ ❯❯❯ kubectl delete deployment hello-node
deployment.extensions "hello-node" deleted

~ ❯❯❯ kubectl delete service hello-node
service "hello-node" deleted
Using YAML in Kubernetes
Create a yaml file for deployment
apiVersion: apps/v1
kind: Deployment
metadata:
  name: nginx-deployment
  labels:
    app: nginx
spec:
  replicas: 3
  selector:
    matchLabels:
      app: nginx
  template:
    metadata:
      labels:
        app: nginx
    spec:
      containers:
      - name: nginx
        image: nginx:1.7.9
        ports:
        - containerPort: 80
---
apiVersion: v1
kind: Service
metadata:
  name: nginx
spec:
  type: LoadBalancer
  ports:
  - port: 8080
    targetPort: 80
    protocol: TCP
    name: http
  selector:
    app: nginx
Run the two spec in the yaml
❯❯❯ kubectl create -f nginx.yaml
deployment.apps/nginx-deployment created
service/nginx created
Check that nginx is working
❯❯❯ curl localhost:8080
<!DOCTYPE html>
<html>
<head>
<title>Welcome to nginx!</title>
<style>
    body {
        width: 35em;
        margin: 0 auto;
        font-family: Tahoma, Verdana, Arial, sans-serif;
    }
</style>
</head>
<body>
<h1>Welcome to nginx!</h1>
<p>If you see this page, the nginx web server is successfully installed and
working. Further configuration is required.</p>

<p>For online documentation and support please refer to
<a href="http://nginx.org/">nginx.org</a>.<br/>
Commercial support is available at
<a href="http://nginx.com/">nginx.com</a>.</p>

<p><em>Thank you for using nginx.</em></p>
</body>
</html>
Delete the deployment and service
❯❯❯ kubectl delete -f nginx.yaml
deployment.apps "nginx-deployment" deleted
service "nginx" deleted
References
- MiniKube Installation - https://kubernetes.io/docs/tutorials/hello-minikube/
- Deployments - https://kubernetes.io/docs/concepts/workloads/controllers/deployment/
- Kube Services - https://kubernetes.io/docs/concepts/services-networking/connect-applications-service/